

Chat – The Central Interaction Surface
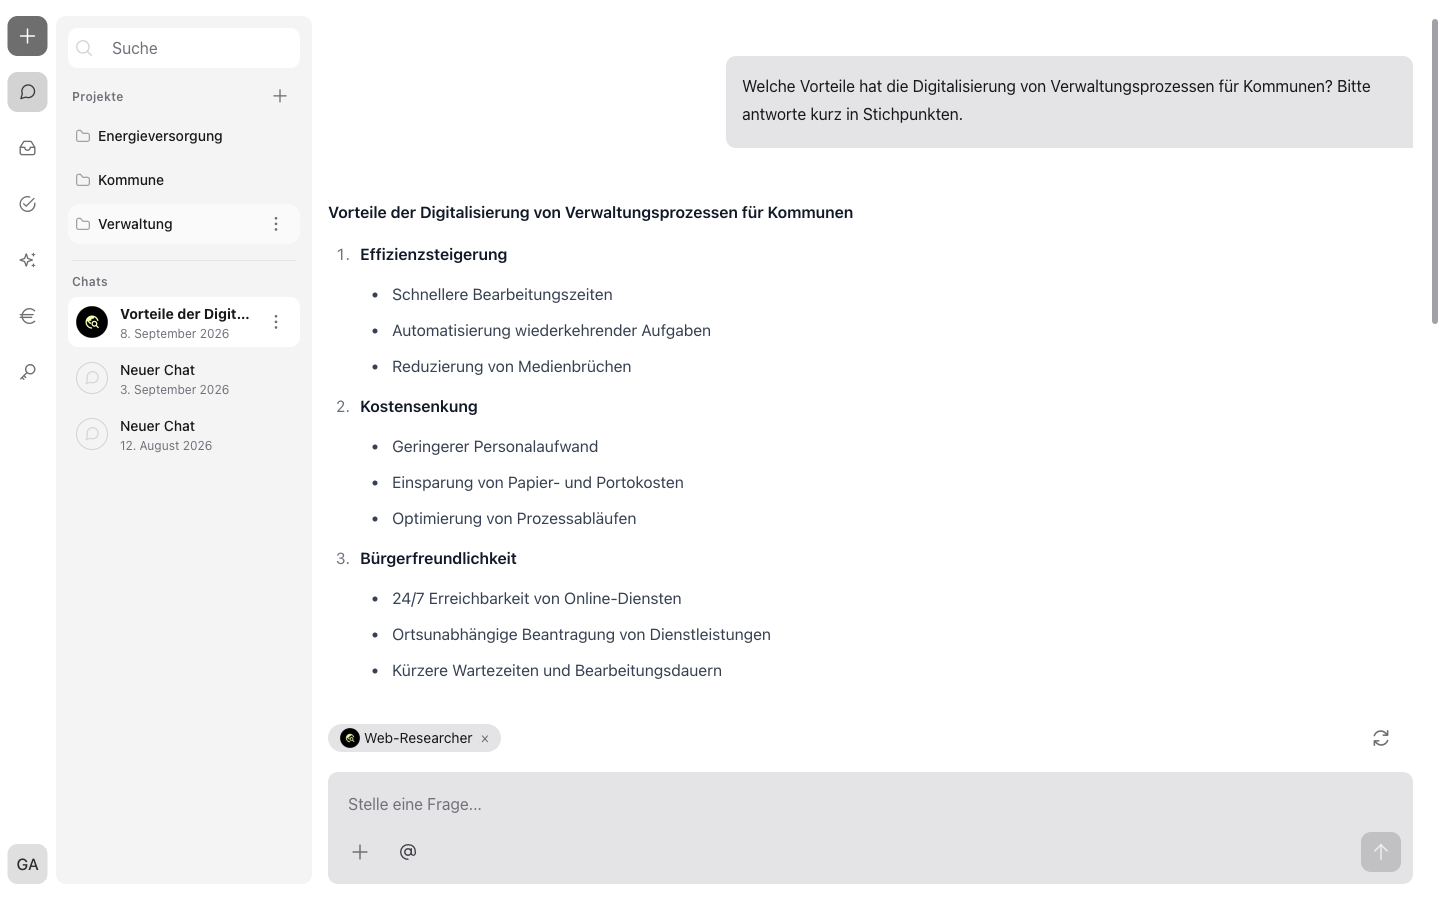
The chat is the central interface of incoreon AI. Tasks are delegated to agents, questions are asked, and files are analyzed – all in text form. Writing these inputs is called prompting (see Introduction to incoreon AI).
What Is the Chat Suited For?
What is possible in the chat depends on the selected agent and its capabilities – e.g. internet search or email access (see Agent Components in Detail). Typical use cases:
- Have documents checked and summarized, e.g. reviewing vacation requests before deciding
- Have numbers and tables analyzed, e.g. comparing revenue across Excel files
- Have texts written, e.g. emails, reports, or minutes
- Have finished files created, e.g. Word or Excel documents
- Have processes and relationships visualized as diagrams, e.g. as flowcharts or mind maps
- Research with internet search, with sources
- Create to-dos and information items directly in the chat and assign them to people (see ToDos and Information)
- Have emails and appointments managed via Microsoft Mail and Microsoft Calendar
- Have subtasks delegated to sub-agents (see Multi-Agent Systems and Sub-Agents)
- Have agents set up by describing the goal in the chat (see Creating and Configuring Agents)
The Chat Interface at a Glance
The chat consists of three areas:
- Chat history (left): all chats and projects – from the Pro license
- Message area (center): questions, instructions, and answers in alternation
- Chat input area (bottom): text input, agent selection, file upload, and sending
Starting a Chat
A new chat is started via  in the navigation. A new chat is initially titled “New chat”. After the first complete answer, incoreon automatically assigns a fitting title. The title can be changed at any time (see Renaming and Deleting Chats).
Note
In the Lite license, opens an overview of the assigned agents. A chat starts directly with the selected agent.
Chats are also created automatically: from to-dos and information items, or through configured automations (see Automation and Workflows). These chats also appear in the chat history and can be continued there.
Selecting an Agent or Using Internet Search
Via  below the text field, the list of available agents opens. The list is sorted alphabetically and can be searched.
- The selected agent appears as a chip above the text field and is removed again via
 .
. - Agents with sub-agents are marked with
 .
. - If an agent is greyed out, either its cost limit has been reached or access rights to its sub-agents are missing. The reason appears in the tooltip – a small info field that opens when the mouse pointer touches the entry.
Note
Agents are set up for specific tasks and bring their own knowledge and capabilities (see Using the Agent Library and Templates). The agent selection stays active across several messages and can be changed at any time.
Without an agent, internet search is not activated automatically. It is enabled and disabled via – with internet search enabled, the chat researches on the internet instead of agent knowledge.
Mentioning People and Groups
After typing @ in the text field, a list with users and groups of the company opens. incoreon recognizes mentioned people in the further conversation – this way, to-dos and information items can be created directly for the right person.
Uploading Files
Files can be added to the chat in three ways:
- via and then “Upload file”
- via drag & drop into the chat input area
- by pasting from the clipboard, e.g. screenshots
Formats supported by default: PDF, DOCX, PPTX, XLSX, CSV, PNG, JPG/JPEG. The supported formats can vary by company – additional formats will be added in the future or are available on request. A maximum of 50 files at 20 MB each is allowed per upload; PDFs and documents with at most 500 pages are processed.
Each file appears as a chip above the text field:
 The file is being processed. Sending is only possible once processing has finished.
- removes the file again.
 Processing failed. The reason appears in the tooltip, e.g. “too many pages”. Failed files must be removed before sending.
Note
Unsent inputs and uploaded files are preserved when switching to another chat and returning later.
Sending a Message
After writing a question or instruction, the message is sent via  (or Enter). The answer appears directly below and can be read live while it is being created.
While the answer is being created, the send button becomes the stop button  : one click aborts the answer. The parts already visible are discarded, and the question can be asked again or adjusted.
Via  (“Try again...”), the last answer can be regenerated. Since answers are not always identical, a new attempt can help when an answer does not fit.
Reading and Using Answers
Answers appear on the left in the message area:
- Thought process: In a dashed speech bubble, the agent shows its reasoning steps. Via
 , you can switch between thought process (“Show thought process”) and answer (“Show reply”).
 - Sub-agent activities: When the agent calls in a sub-agent, a card shows its work live. Long content can be expanded and collapsed via “Show all” and “Show less”.
- Formatting: Answers contain formatted text, tables, links, code blocks with a
 button, and diagrams (see Diagrams in Answers).
 - (“Copy reply”) transfers the answer as plain text to the clipboard.
- The agent symbol shows which agent answered; the globe symbol
 indicates an active internet search.
 - Used knowledge: When the agent has used files from its knowledge for the answer, these files appear below the answer as chips with file names – this makes it traceable which documents the answer is based on. Depending on the agent's setting, the files can be downloaded via
 (see Adding Knowledge).
 - Files created by the agent, e.g. Word or Excel documents, appear below the answer with a button.
Diagrams in Answers
Agents can present processes and relationships as a diagram – e.g. a process flow as a flowchart or a collection of topics as a mind map. An instruction like “Present the process as a flowchart” is enough. The diagram appears as a graphic directly in the answer. The diagrams are based on Mermaid – a widely used notation for describing diagrams as text.
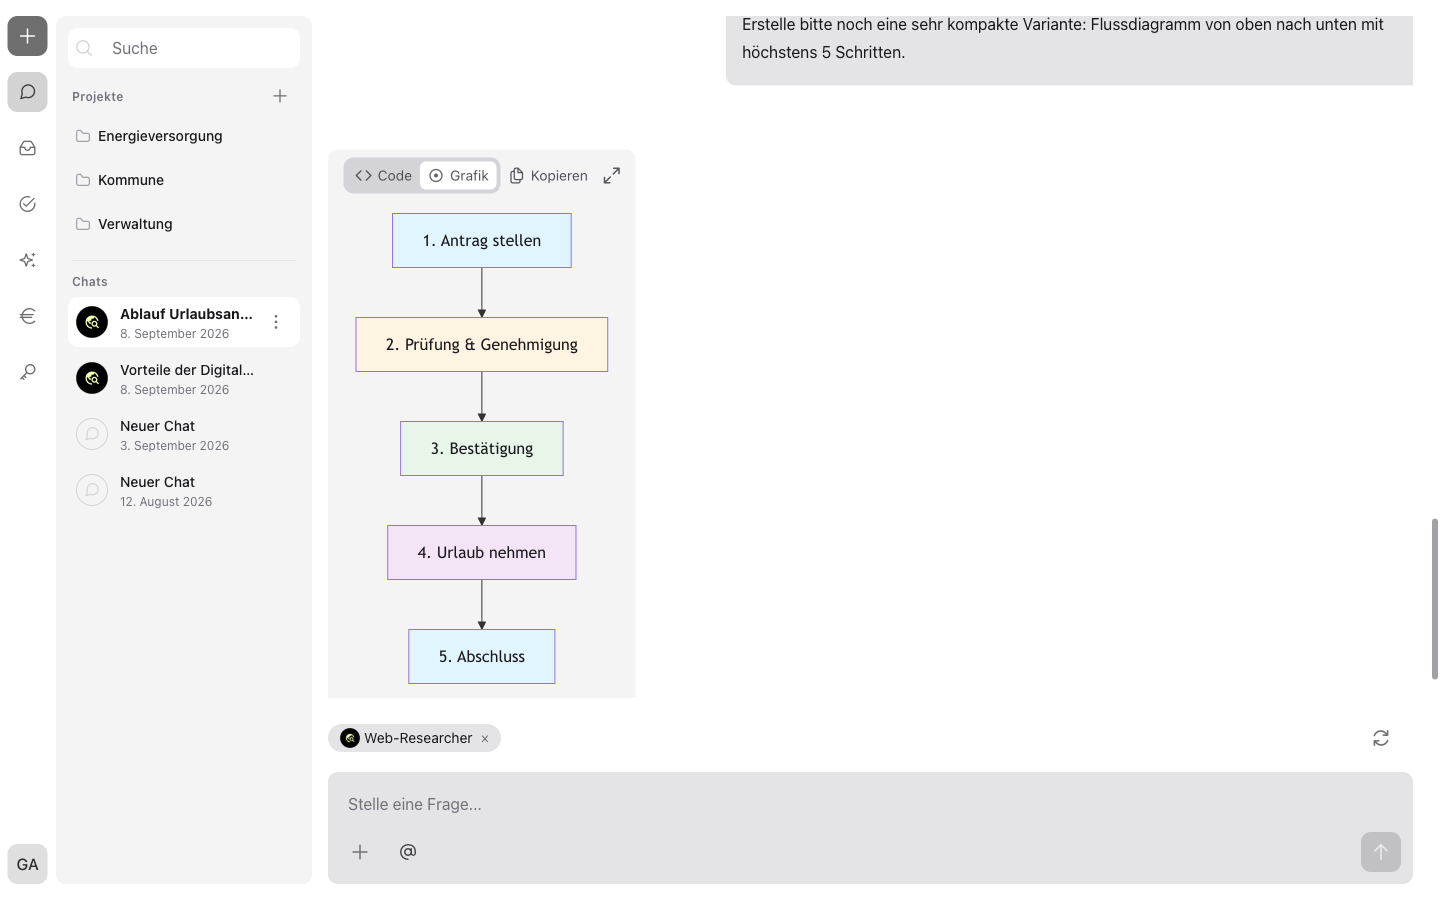
While the answer is being created, the source code of the diagram – the text description from which the graphic is generated – appears first. Once the answer is complete, the graphic is displayed.
At the top right of each diagram, four buttons are available:
- “Code” and “Graphic”: switch between the graphic and the source code of the diagram.
- “Copy”: copies the source code to the clipboard. The button briefly confirms the copy with “Copied”.
- The enlarge button
 opens the diagram in the enlarged view.
If a diagram cannot be displayed, the notice “Failed to render diagram” appears. Via “Code”, the source code can still be displayed.
Working in the Enlarged View
The enlarged view shows the diagram across almost the entire screen:
- Zooming in and out: via
 and
and  or with the mouse wheel. Above the initial size, the current level appears as a percentage at the top left of the view.
 - Moving: move the diagram with the mouse button held down.
- Resetting: restores the initial view.
- Closing: via at the top right of the view, a click on the area outside the diagram, or the Esc key.
Editing and Deleting Your Own Messages
When hovering over a sent message, two buttons appear:
 edits the message.
 deletes the message.
Warning
When editing with , the answer is then regenerated – the history after the edited message is removed in the process. When deleting with , the entire history after this message is also deleted.
Messages from other users – for example from shared chats – cannot be edited or deleted. They are marked with the person's initials.
Managing the Chat History
License
Available from the Pro license.
The chat history on the left lists all chats with participating agents, title, and date.
Finding Chats
Via the search field at the top of the chat history, all chats are searched by full text; the list filters itself while typing.
Organizing Chats in Projects
Via next to “Projects”, a new project is created. Chats can be dragged into a project via drag & drop or assigned via “Move to project” in the three-dot menu  of the chat. “Remove from project” dissolves the assignment again. Projects themselves can be renamed or deleted via their three-dot menu.
Renaming and Deleting Chats
In the three-dot menu next to a chat:
- “Rename” changes the title.
- “Delete” removes the chat after confirmation. A running answer is aborted in the process.
Sharing Chats
In the three-dot menu next to the chat, “Share chat” is selected. A link is generated that can be copied and forwarded to colleagues.
Warning
The link is valid for 3 days. New messages after sharing are not saved in the link.
When opening the link, a copy of the chat is imported. The conversation can be continued with the user's own authorized agents.
Recognizing Chat Types
Not every chat is started manually: some originate from to-dos or automations. In the chat history, a colored border around the agents' profile pictures shows where a chat originates and whether it requires own action; when hovering with the mouse pointer, the type appears as a tooltip:
- “ToDo Chat” (blue border): In this chat, a to-do is being worked on – for example, a decision or a processing whose result the agent is waiting for. Once completed, the chat history goes back to the agent and the workflow continues (see Continuing in the Chat).
- “Automation Chat” (orange border): The chat was started by an automation – for example, by an incoming e-mail – and runs without a manual start (see Automation and Workflows).
- “Orchestrator Chat” (green border): In this chat, the agent controls a workflow. The conversation records which to-dos and information items it created and how it reacted to results flowing back (see Viewing the Orchestrator Chat).
Understanding Notices in the Chat
- “The context limit has been reached”: The context window – the chat's short-term memory – is full. It is recommended to start a new chat with a short summary of the most important results.
- “Connect account”: The agent requires a renewed login to a connected service. Via “Connect now”, the connection is renewed in the profile (see Profile).
- Missing access rights for sub-agents: The message cannot be sent. Remedy: select a different agent or ask the administration for access (see Roles and Permissions).
- Cost limit reached: The agent has reached its monthly limit. Remedy: select a different agent, chat without an agent, or – with global admin or group admin rights – increase the cost limit yourself (see Guide: Changing an Agent's Cost Limit).
- On errors, incoreon shows an Error ID. This information speeds up support (see Troubleshooting and Support).
Chat FAQs
Why can't I send my message?
There are four possible causes:
- Files are still being processed.
- The processing of a file has failed – the reason appears in the tooltip, e.g. “too many pages” (see Uploading Files).
- The selected agent has reached its cost limit.
- Access rights to its sub-agents are missing (see Missing Access Rights for Sub-Agents).
Remedy: wait for or remove the files, switch the agent, or ask the administration for access (see Understanding Notices in the Chat).
Why is a diagram not displayed?
The diagram cannot be displayed. Instead, the notice “Failed to render diagram” appears. Via “Code”, the source text remains visible; alternatively, a new request to the agent helps.
Why is my Excel list not analyzed correctly?
The selected agent may not be suited for tables. Select a more suitable agent (see Using the Agent Library and Templates).
When should I start a new chat?
When switching topics or when the context limit is reached. Summarize briefly and continue in the new chat.
Who can I share a chat with?
With all users of the same company who receive the link.